ATTENTION Embroidery Business Owners: Do You Bring In Enough To Pay Yourself A Good Paycheck?
“How Embroidery Business Owners Just Like You Can STOP Struggling To Make Your Embroidery Business Work! You Too Can Learn Quickly & Easily To Become A Professional Embroidery Expert & Build A Very Successful Embroidery Business!”
If you are still not able to bring home a paycheck after paying all of your other expenses, this Gold Plus level is the perfect place to start! You may have employees that are all getting paid, but at the end of the week, you find it impossible to write a check for you. I know how this goes! I went through this for 15 years before I finally learned how to run my business in such a way that I could actually write myself a check. What a great feeling that was. You need to be paid first! Remember that!
Does This Sound Familiar?
A Customer comes in and wants a price quote and he is in a hurry. You have no idea how to give him a price when he is standing right in front of you! A customer brings in a dozen shirts that he purchased at a discount store and wants them embroidered in a hurry. You have to work up his design and he is resisting the set up charge. How do you handle this? The fact is you are not alone, I hear it all the time!
- You are pricing your embroidery about the same as the competition, but you are not making enough money to pay all of your bills!
- You keep growing and bringing in more business, but there is never enough money for you!
- You have too much work that is all due at the same time and you don’t know how you are going to be able to get it all done! What do you do first? How do you get all of this work scheduled?
- There are months when there is hardly enough embroidery work to pay the bills! What can I do to bring in more work during those times?
- You spend so much time waiting on customers that your production suffers!
- Customers want their embroidery work rushed‚ you are not even sure if you can afford to do a rush job!
- Customers want an embroidery thread color that you do not carry and it will cost you the entire profit from the job just to have the thread shipped in! What do you do?
- You need some help to get all of your work done but you are not sure how to start with a new employee? Where do you find them?
- Are you experiencing other problems with your embroidery business?
 Joyce Jagger, The Embroidery Coach is an expert in Embroidery Business Training and currently has the longest running Embroidery Coaching Program on the Internet.
 Joyce Jagger, The Embroidery Coach is an expert in Embroidery Business Training and currently has the longest running Embroidery Coaching Program on the Internet.
As a former owner of a profitable embroidery business, she is now in the business of helping you start your own profitable embroidery business or help you take your current embroidery business to a higher profit level. She has spent over a decade helping other embroiderers get started and increase their profits. Embroidery can be a very lucrative business when you have the right systems, approach, and tools in place!
Building An Embroidery Business Is Not Easy When You Have To Do It Alone!
It can be exciting and overwhelming at the same time! There is so much to do, so much to learn and so many areas to prepare for before you can even open the doors for business. Following this step by step embroidery training will give you a firm foundation, shorten your learning curve and will begin to set you up for success. You will be up and running quickly!
You need:
- To have a pricing structure that will work in any type of situation.
- A marketing plan so that you are always bringing in orders, even in the traditionally slow months.
- A quoting system so that you can quickly quote a job while the customer is is
- Sales tools to make it easy and quick as you are waiting on customers.
- A way for your customers to easily find you.
- A system to help you stay in touch with your customers and prospects.
- Great looking samples to show your prospective customers
- To understand what kind of Underlay & Pull Compensation to use to create high quality design that will look great on any type of fabric or garment
- To learn how to save time in setting up your designs in your software. This can be a real time suck if you are not taught the proper way
- To learn how to set up your small lettering so that it sews out great on any type of fabric! This is so essential if you want to keep corporate clients!
- The skill to create beautiful large & small monograms, even sets of monograms for high end customers!
- To know how to work with all of the performance fabrics that is in demand today!
- To know how to fix all types of mistakes! Unfortunately they do happen!
- And a whole lot more!
Introducing: The Gold Plus Level of “The Embroidery Training Resource Center!” This is the Next Step in the Foundation of Building a Successful Embroidery Business!

Embroidery Basics
Inside of Embroidery Basics, you will find multiple videos in each category on where to learn the basics of how to hoop your garments, Design Placement and more.
You will receive easy to understand instructions that include many basic techniques…such as:
![]() Basic Set Ups & Tools – You are taught many basic setups and tools that you need to use. How to change a cone of thread, how to change a needle, how to change a bobbin and the basic tools for each.
Basic Set Ups & Tools – You are taught many basic setups and tools that you need to use. How to change a cone of thread, how to change a needle, how to change a bobbin and the basic tools for each.
![]() Embroidery Backing & Toppings – You are given very specific guidelines for selecting the right backing/stabilizers
Embroidery Backing & Toppings – You are given very specific guidelines for selecting the right backing/stabilizers to use for each of the different fabrics.
![]() Embroidery Thread Tensions – You are taught how to set your tensions and the best tools to use and how to keep your embroidery thread tensions balanced so that you avoid bird nesting and have great quality stitching.
Embroidery Thread Tensions – You are taught how to set your tensions and the best tools to use and how to keep your embroidery thread tensions balanced so that you avoid bird nesting and have great quality stitching.
![]() Favorite Embroidery Backing Recipes – I even share my favorite backing/stabilizer recipes for most fabrics along with the Style Numbers of each one and the source for my backings to make it easy!
Favorite Embroidery Backing Recipes – I even share my favorite backing/stabilizer recipes for most fabrics along with the Style Numbers of each one and the source for my backings to make it easy!
![]() Embroidery Hooping Guidelines – Easy to follow guidelines with pictures showing you many garments along with what backing & needles to use for different types of garments avoiding mistakes!
Embroidery Hooping Guidelines – Easy to follow guidelines with pictures showing you many garments along with what backing & needles to use for different types of garments avoiding mistakes!
![]() Embroidery Placement – A Placement Chart for the Left Chest or Right Chest embroidery design applications and Guidelines are given for placement for all of the most popular applications on garments as well as linens!
Embroidery Placement – A Placement Chart for the Left Chest or Right Chest embroidery design applications and Guidelines are given for placement for all of the most popular applications on garments as well as linens!
![]() Embroidery Finishing – How to finish a garment to create that quality presentation whether it is a sample or a completed order for a customer! Finishing a garment properly is huge in how your customer will perceive your quality!
Embroidery Finishing – How to finish a garment to create that quality presentation whether it is a sample or a completed order for a customer! Finishing a garment properly is huge in how your customer will perceive your quality!
![]() Embroidery Machine Maintenance – How to maintain your machines on a daily, weekly, and monthly basis with forms to keep track of your maintenance.
Embroidery Machine Maintenance – How to maintain your machines on a daily, weekly, and monthly basis with forms to keep track of your maintenance.
I share my insider secrets from over 30 years of experience that you can’t find in any classroom. What this means to you is less trial and error! I once had a teacher tell me that “Smart people learn by their mistakes, but Smarter people learn from other people’s mistakes!” That is what I want for you! There is no reason for you to go through what I did, you can learn and profit from my mistakes!
“Step by Step Embroidery Techniques For Many Types Of Items”
Inside of Embroidery Techniques, you will find multiple videos and will receive Step by Step Instruction for many basic items. I show you where to place your designs, how to hoop your garments, sew out your designs on many items such as:
 Knit Shirts – Polos – Golf – Staff Shirts – Sweatshirts – T-Shirts – Woven Shirts – Knit shirts and woven shirts can be embroidered in many different locations, but the number 1 placement is the left chest. I show you how to hoop them properly, how to place them into the machine so that nothing gets caught and then how to run the actual design. There are many tips and tricks throughout all of the videos.
 How To Embroider Caps – Many people struggle with caps! This should not be. Caps can be your biggest money maker! I show you step by step how to easily hoop and embroider a design on a cap! There are many different types of caps and you must master each one in order to be able to offer your customers a good selection. You want to be able to embroider the cap on the front and sides in one hooping and I show you how to accomplish this. I have a very simple method for this.
 How to Embroider Jackets – The most popular placements are Left Chest, Sleeves and Jacket Backs. The techniques that I use are simple and will apply to vests also with the exception of sleeve applications. I also have an article on how to apply Athletic twill on jacket sleeves. I show you how to determine placement for the jacket back, with and without a hood.
 How to Embroider Linens – I show you how to embroider a tablecloth and napkins. I give you a placement chart for many other linens, such as Sheets and Pillowcases, Towel Sets, Duvet Covers, Pillow Shams, Gift or Decorative Pillows, Shower Curtains and even a Bath Mat. Monogrammed Linens make very welcomed Bridal gifts and House Warming gifts.
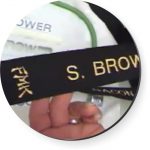
 How To Make Patches – Patches are very easy to make as long as you only have a small quantity. This is a simple way to create company patches if you have a customer that only has a few employees and furnishes their uniforms. I show you how to embroider a name on a patch blank. This series of videos will show you in a step by step method how to prepare your fabric for your patches, how to set them up, how to hoop your fabric, how to finish your patches.
 Belts & Straps – In these videos, I show you how to embroider a Karate Belt, however, the same method can be used for any type of belt, strap or ribbon that a customer wants embroidered. I show you a simple method to accomplish this embroidery using your hoops so that you do not have tong to purchase any other attachments or clamps.
 Bags – In these videos, I show you how to embroider bags using a hoop and I also show you how to hoop a bag using a clamp. Bags make great gifts and can be embroidered with monograms or with corporate logos.
![]() Blankets – In these videos, I show you placement, how to hoop and embroider a fleece blanket and a suede fabric blanket. They are easy to do and are another item that makes a great gift for weddings, anniversaries, birthdays, graduations, and even for that loved one in a nursing home.
Blankets – In these videos, I show you placement, how to hoop and embroider a fleece blanket and a suede fabric blanket. They are easy to do and are another item that makes a great gift for weddings, anniversaries, birthdays, graduations, and even for that loved one in a nursing home.
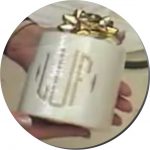 Miscellaneous Items – In these videos, I show you how to embroider several miscellaneous items, such as toilet paper, a Christmas stocking, a Wine bottle bag, and even a Bridal Handkerchief. Every one of these items makes great gifts. I love to embroider the Toilet paper and include it in a set of Towels for a Wedding gift! Not only do the recipients love it, it always creates a smile on their face!
… and much, MUCH More!
“Simple Step by Step Instructions For Embroidery Repairs!”
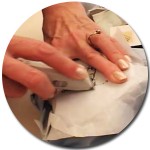 I give you simple step by step instructions on how to repair those horrible mistakes that we all try so hard to avoid! Unfortunately, everyone makes a mistake now and then, but you need to know how to save those expensive garments when mistakes do occur! Repair almost any mistake instead of starting from scratch! Sometimes you have garments that cannot be replaced! It is very important to have the skills to be able to fix these mistakes just in case you have items that customers have brought in to you and you do not have any way of replacing these items!
Design Creation Basics
If you will spend 20 minutes per day in my programs learning how to create those WOW designs, you will be able to develop the skills that you need to make it happen!
These videos will give you the skills to tackle embroidery jobs that you previously had to turn down. The skills learned from these videos will greatly increase your monthly revenue! When I say Design Creation Basics, I do not mean digitizing. Within these videos, you are going to learn a lot of editing skills and it is extremely important to know how to edit and make your designs production friendly! You will learn those skills inside of these videos!
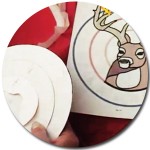 Embroidery Applique – There are several videos that show you step by step how to create one color appliques, 2 color appliques and more. I created an applique on a jacket back using several colors with a lot of embroidery added. I also show you a simple way to create the applique made from felt fabrics that are so popular with the school crowd and young adults! I even show you how to create the zig zag athletic twill look that can be done on uniforms. I show you how to set up an applique in the software.
![]() Puff or 3D Foam Embroidery – Puff embroidery on caps is easy when you have the right instructions. I show you a simple method for applying the puff or foam embroidery on caps. If you want to create a single block letter on a cap, I give you Step by Step instructions showing you how to create the file for your puff embroidery design using your basic stock block embroidery font lettering that you have in your software. For most designs, it is best to have the file digitized by a professional and then you will follow this simple method for applying the foam.
Puff or 3D Foam Embroidery – Puff embroidery on caps is easy when you have the right instructions. I show you a simple method for applying the puff or foam embroidery on caps. If you want to create a single block letter on a cap, I give you Step by Step instructions showing you how to create the file for your puff embroidery design using your basic stock block embroidery font lettering that you have in your software. For most designs, it is best to have the file digitized by a professional and then you will follow this simple method for applying the foam.
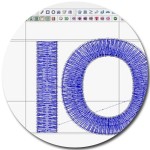
 How To Embroider Small Letters – Small lettering can be an issue for many people especially when they are first starting out with their embroidery business. I show you how to create small lettering that will sew out great on any type of fabric. I even give you the right settings to use for your lettering designs. I use the Pulse software but these same settings will work in any embroidery design software. The names of your tools may not be the same as mine, but your underlay, pull comp, and density settings will be present in your embroidery software.
 How To Use Embroidery Underlay Stitching – It is very important to understand what type of underlay stitching to use when you are creating your embroidery designs whether you are digitizing a design or setting up a design using basic lettering. Underlay is your foundation for your embroidery and it is very important to use the right type of underlay stitching in order to produce high-quality embroidery. I teach you how to use the different types of underlay stitching in your embroidery designs and lettering.
 Understanding Embroidery Push & Pull Compensation – Every stitch type and segment of our design needs push or pull compensation added for high quality. Understanding Push & Pull Compensation is extremely important and is one of the basics of every design. I teach you exactly what your settings are that you should apply for your Pull Compensation and show you the difference in your push and pull compensation and I also teach you what settings to use for the different types of fabrics.
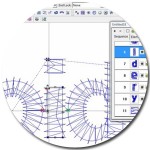
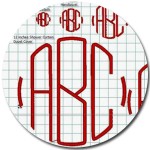 How To Create Monograms – This is a full program teaching you how to create 1, 2, 3 and even 4 letter monograms using your standard embroidery fonts that you will find in your embroidery software and true type fonts. I show you how to create full sets of monograms ranging from 12 inches down to 1.5 inches. I also include a beautiful Medieval Font that I created for you. I offer it in many formats so that it will work in your software. I also include 2 true type fonts that can upload into your software that makes beautiful monograms.
 How To Create Embroidery Design Templates – In this program I teach you how to create basic left chest sized, jacket back sizes and cap design templates. This will save you a lot of time and once you have your templates created, all you have to do is change the letters, tweak the spacing and your design is ready to sew out. You can create your basic lettering designs in a very short time when you learn how to create these templates. I even include a chart with all of my settings on it.
 How To Create Embroidery Designs Using Letters & Shapes In Your Embroidery Designs Software – In this program, I teach you how to edit fonts and shapes to create embroidery designs and lettering to match your customer’s logo. I show you three different types of designs and teach you, step by step, how I created each one so you will know how to do it. The first design is done with shapes and stock embroidery lettering. The second one is with stock artwork and a true type font. The third is done with a very narrow true type font that requires a lot of editing techniques.
Business Building Strategies
These videos will give you the skills to Plan out your Embroidery Business, Price your Embroidery product correctly and learn how to Market your Embroidery Business! These skills are going to help you move your Embroidery Business to the next level! These strategies will give you the skills to organize and create a profitable Embroidery Business!
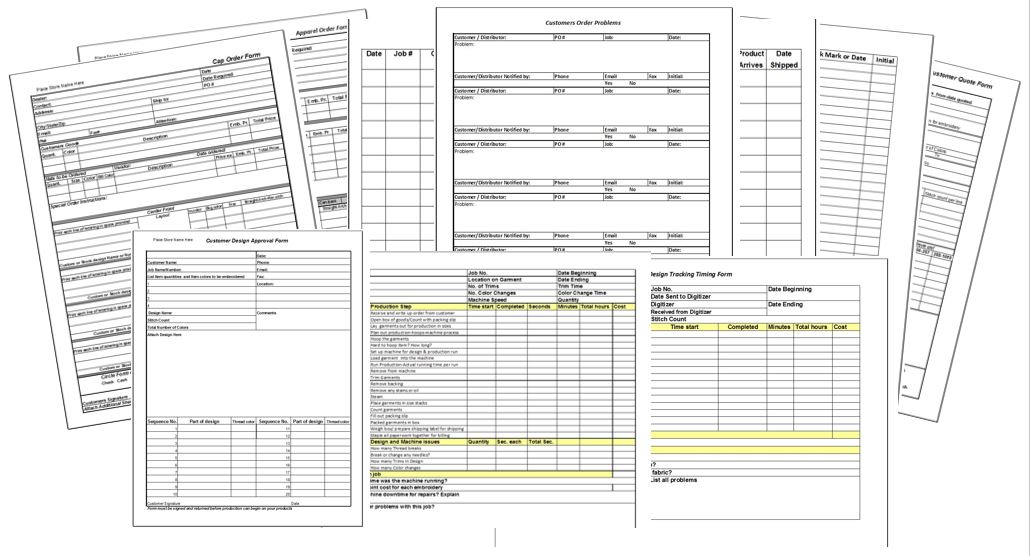
![]() Embroidery Business Forms – You will receive all of the basic Business Forms that you need to run your business such as Customer Order Forms, Supplier Order Form, Embroidery Design Quote Form, Design Approval Form, Release Form, Log in Form, a Packing List and much more! These forms are all given to you in an Excel format so that you can customize them to fit your business needs.
Embroidery Business Forms – You will receive all of the basic Business Forms that you need to run your business such as Customer Order Forms, Supplier Order Form, Embroidery Design Quote Form, Design Approval Form, Release Form, Log in Form, a Packing List and much more! These forms are all given to you in an Excel format so that you can customize them to fit your business needs.
![]() Embroidery Production Forms – You will receive the basic Production Forms that will help you to keep your workflow going smoothly such as Embroidery Machine Scheduler, Embroidery Design Worksheet, Embroidery Production Sheet, and Embroidery Spoilage Report forms. These forms are all given to you in an Excel format so that you can customize them to fit your production needs.
Embroidery Production Forms – You will receive the basic Production Forms that will help you to keep your workflow going smoothly such as Embroidery Machine Scheduler, Embroidery Design Worksheet, Embroidery Production Sheet, and Embroidery Spoilage Report forms. These forms are all given to you in an Excel format so that you can customize them to fit your production needs.
![]() Embroidery Production Tracking & Scheduling System – This is a combination log in, production tracking, and scheduling form. You will be able to track and schedule each job and know exactly how long the job is going to take. You will even know how many hours of embroidery work you have in house at all times.
Embroidery Production Tracking & Scheduling System – This is a combination log in, production tracking, and scheduling form. You will be able to track and schedule each job and know exactly how long the job is going to take. You will even know how many hours of embroidery work you have in house at all times.
![]() Embroidery Business Plan – This is a full program that will teach you how to plan out each area of your business and create a full embroidery business plan, one that you can use on a daily basis as your guide to running your embroidery business. I teach you how to create your 12 months Marketing Plan, how to create your Projections and even your Cash Flow report!
Embroidery Business Plan – This is a full program that will teach you how to plan out each area of your business and create a full embroidery business plan, one that you can use on a daily basis as your guide to running your embroidery business. I teach you how to create your 12 months Marketing Plan, how to create your Projections and even your Cash Flow report!
![]() How to Price Embroidery – This is a full program teaching you how to create a pricing structure that will help you make the profit that you have been looking for. This program includes many formatted spreadsheets to work with and create a pricing structure that will fit any type of pricing situation within your apparel decorating business!
How to Price Embroidery – This is a full program teaching you how to create a pricing structure that will help you make the profit that you have been looking for. This program includes many formatted spreadsheets to work with and create a pricing structure that will fit any type of pricing situation within your apparel decorating business!
![]() Embroidery Design Quoting Tools – You will finally have the tools to use to quote your embroidery designs! I teach you how to quote designs quickly while the customer waits! No more having to get back to them with a quote and taking the chance that they will move on to someone that can quote a design quicker!
Embroidery Design Quoting Tools – You will finally have the tools to use to quote your embroidery designs! I teach you how to quote designs quickly while the customer waits! No more having to get back to them with a quote and taking the chance that they will move on to someone that can quote a design quicker!
![]() Embroidery Business Marketing System – This is a full program teaching you how to market your business offline and online. I teach you how to organize all of your products and how to set up your website as well as your entire marketing system so that you will be able to reach and follow up with your market.
Embroidery Business Marketing System – This is a full program teaching you how to market your business offline and online. I teach you how to organize all of your products and how to set up your website as well as your entire marketing system so that you will be able to reach and follow up with your market.
It is so much more comprehensive than any of the others I have tried.
I want to thank you for all of your hard work and for the incredible amount of invaluable information you offer to new and established embroiderers. You are amazing! I just had to drop you a quick line to let you know how thrilled I am having access to your How To Price Program! What a great program! I started my business in 2006 and believe me, I’ve done a lot of research over the years.
Once we moved out of our home into a retail location, things changed dramatically. I have sat in on several classes over the years on how to price embroidery. Each of them had their own twist, but basically, they all had the same information for the calculations, so when I saw your program, I figured that it was just more of the same information so I passed it over.
We have been struggling financially and it wasn’t until the gal that does my invoices told me for the 100th time that I was not charging enough, that I decided to take another look at it. I thought I knew the formula. Now that I have your program, I know how wrong I was! It is so much more comprehensive than any of the others I have tried.
Yes, the core of the calculations is the same, but the additional variables that absolutely MUST be taken into consideration are built right into the system! Once you put your information into the base program, it creates your price list for you! It is a tremendous tool! The videos that explain the system really simplify the entire process. It is well worth the investment!
The “Gold Plus Level” is the perfect place to start if you started your Embroidery business and you want to move your Embroidery Business to the next level. The skills that you will learn from The Embroidery Coach will help your business grow and be more efficient for the rest of your life!
You have all of this information at your fingertips!” A monthly investment of only
$99.95
or
An Annual Investment of Only
$997